Written by Alison Hoover and published on https://www.lawnstarter.com/
Ever wondered how the pros cut down trees?
In a way, a tree removal is an art form, requiring skill and patience to complete properly while maintaining safety at all times. So unless you are a trained arborist, tree cutting is not a DIY job. Professional arborists and tree cutters must know the ins and outs of every tree they work on so they can make cuts safely without putting their own safety and the safety of others at risk.
So if you’ve ever wondered how the pros work their magic, here’s a look at arborists and their expertise needed to cut down trees safely.
Table of Contents
How to Cut Down a Tree Safely in 10 Steps
So, you want to cut down a tree and Paul Bunyon isn’t available to help. If you’re comfortable with a chainsaw, some trees are easily taken down on your own. But others, are best left to the experts.
We’ve laid out how to fell a tree safely in 10 steps:
- Decide if it’s safe
- Gather equipment
- Estimate the fall
- Clear escape routes
- Plan the notch
- Cut the notch
- Insert wedges
- Make the felling cut
- Remove branches and cut firewood
- Get expert help
If this feels like too much, or you’d rather a pro do the job, feel free to skip to Step 10.
1. Decide if it’s Safe
If you’re reading this guide, you’re probably looking to cut down a tree a bit bigger than the struggling fruit tree you planted three years ago. This means you need to take safety precautions. Felling trees is a pretty big DIY job.
If the tree in question has a lot of broken or dead branches, or if your tree is diseased, you may want to skip to the final step in this guide.
All those branches will come down as you work, and they aren’t likely to pile themselves neatly into firewood.
Walk around the tree and your property and look for any obstructions, including power lines, buildings, electrical boxes, and heavy growth.
Estimate the fall area and determine where the tree will land. If any obstacle is in your way, you should skip to Step 10.
2. Gather Equipment
Proper safety gear is the first thing on your to-do list. Here’s what you need:
- A hard hat
- Safety glasses
- Hearing protection
- Work gloves
- A chainsaw
- Felling wedges
Depending on where you live, you might need a permit from your homeowners association or city, so check local laws and rules before picking up the chainsaw. And for safety, enlist a trusted friend. Two sets of eyes are always better than one. Plus, you need someone to yell, “TIMBER!”
3. Estimate the Fall
It can be difficult to measure the exact height of the tree and determine where it may fall. Assess the tree for uneven growth, whether due to disease, overcrowding, or any other factor. If the tree is heavier on one side than another, it will fall that way regardless of your attempts to redirect it.
For a better estimate, hold an ax at arm’s length, and close one eye. Walk away from the tree as necessary until the top and bottom of the tree are aligned with the top and bottom of your ax. Where you stand is roughly where the top of the tree will fall.
4. Clear Escape Routes
Take the extra time to make sure you have a safe way to retreat from the worksite. It’s best to have two alternate routes and ensure they’re clear from debris. If something goes wrong, you want a direct path to safety.
5. Plan the Notch
The notch is what will allow the tree to fall properly, so you want it on the “fall side” so the tree will fall in the direction of the notch.The fall side should be the heaviest side of the tree.
Cut at a comfortable working height. If it feels like the stump will be too big, remember you can cut down the base of the tree later.
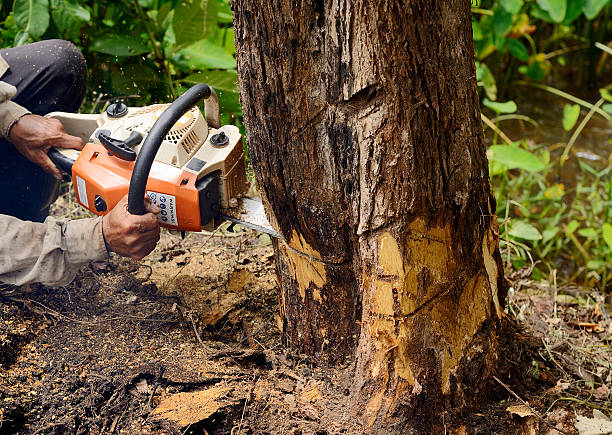
6. Cut the Notch
Start with the top cut, moving at about a 45-degree angle downward. Cut about 1/3 of the way into the trunk. Below that, make a second cut parallel to the ground. This horizontal cut should come pretty close to meeting the first cut.
7. Insert Wedges
Depending on the tree you’re looking to take down, wedges may be necessary. If the tree’s diameter is more than 18 inches, wedges will help prevent your saw from getting pinched. You can purchase these at any home supply store.
Once the notch is cut, begin the felling cut (Step 8). As soon as you’ve cut enough to insert wedges, stop cutting and pound in the wedges; then complete the cut.
8. Make the Felling Cut
This is what will actually make the tree fall. Move to the opposite side of the tree, away from the notch. About an inch or more above the notch, begin an even back cut. You want to create a hinge, so you will not cut all the way through. As the tree starts to move, stop the cut and take one of the paths to safety.
9. Remove Branches and Cut into Firewood
Once the tree is down, the next step is called “limbing”. What this means: You remove the branches from the tree trunk. Then, cut the tree into 16-inch sections; this is called “bucking”. To avoid touching the ground with your saw, cut about three-quarters of the way through, roll the trunk, and complete the cut.
Then you can cut those sections into logs and bust out the marshmallows for a bonfire. But, remember, there are specific rules about transporting firewood.
10. Get Expert Tree-Cutting Help
A tree that needs pruning or removal is often reason enough to call in an arborist. If you can’t ensure safety, if you don’t have the proper equipment, or if you don’t feel confident in your skillset, hire a licensed and insured tree removal company.
Then round up the kids to watch them work – just make sure they keep their distance.
Original post here https://www.lawnstarter.com/blog/tree-care/how-to-cut-down-tree-safely/.