
Written by Admin and published on https://www.doityourself.com/
Pruning is one of the most important tree maintenance practices. Over the years, the way in which we, as foresters, have approached pruning has changed dramatically. Today pruning is a science that, if not done properly, can be very damaging to a tree. Here are some tips that may be of help to you before you take the saw to the tree.
Pruning is often regarded as one of the most intimidating aspects of gardening. Fearful of making a mistake, many people simply avoid it altogether, or indiscriminately cut back plants in a vain attempt to limit their size. Others make pruning cuts only because they think it is something they need to do. When plants are pruned heavily or without a clear purpose in mind, they may end up being worse off than if they were left alone.
Table of Contents
Pruning Trees – Making Cuts
When you’re pruning a tree, cuts should be made so that only branch tissue is removed and stem tissue is not damaged. At the point where the branch attaches to the stem, branch and stem tissues remain separate, but are contiguous. If only branch tissues are cut when pruning, the stem tissues of the tree will probably not become decayed, and the wound will seal more effectively.
Pruning Living Branches
To find the proper place to cut a branch, look for the branch collar that grows from the stem tissue at the underside of the base of the branch. On the upper surface, there is usually a branch bark ridge that runs (more or less) parallel to the branch angle, along the stem of the tree. A proper pruning cut does not damage either the branch bark ridge or the branch collar.Continue reading belowOur Video of the Day
A proper cut begins just outside the branch bark ridge and angles down away from the stem of the tree, avoiding injury to the branch collar (Fig. 1). Make the cut as close as possible to the stem in the branch axil, but outside the branch bark ridge, so that stem tissue is not injured and the wound can seal in the shortest time possible. If the cut is too far from the stem, leaving a branch stub, the branch tissue usually dies and woundwood forms from the stem tissue. Wound closure is delayed because the woundwood must seal over the stub that was left.
| Figure 1. Cutting a small branch | Figure 2. Cutting a larger branch |
The quality of pruning cuts can be evaluated by examining pruning wounds after one growing season. A concentric ring of woundwood will form from proper pruning cuts (Fig. 2). Flush cuts made inside the branch bark ridge or branch collar, result in pronounced development of woundwood on the sides of the pruning wounds with very little woundwood forming on the top or bottom. As described above, stub cuts result in the death of the remaining branch and woundwood forms around the base from stem tissues.
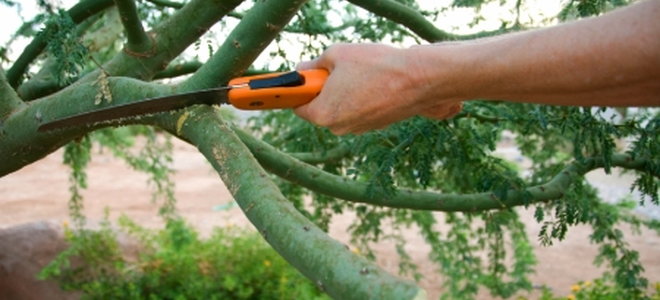
When pruning small branches with hand pruners, make sure the tools are sharp enough to cut the branches cleanly without tearing.
TIP: Our expert gardening advisor, Susan Patterson adds, “Always sterilize pruning tools before you use them.”
Branches large enough to require saws should be supported with one hand while the cuts are made. If the branch is too large to support, make a three-step pruning cut to prevent bark ripping (Fig. 2).
Cut 1 – The first cut is a shallow notch made on the underside of the branch, outside the branch collar. This cut will prevent a falling branch from tearing the stem tissue as it pulls away from the tree.
Cut 2 – The second cut should be outside the first cut, all the way through the branch, leaving a short stub.
Cut 3 – The stub is then cut just outside the branch bark ridge/branch collar, completing the operation.
Pruning Dead Branches
Prune dead branches in much the same way as live branches. Making the correct cut is usually easy because the branch collar and the branch bark ridge, can be distinguished from the dead branch, because they continue to grow. Make the pruning cut just outside of the ring of woundwood tissue that has formed, being careful not to cause unnecessary injury (Fig. 2). Large dead branches should be supported with one hand or cut with the three-step method, just as live branches. Cutting large living branches with the three step method is more critical because of the greater likelihood of bark ripping.
Drop Crotch Cuts
| Figure 3. Crown reduction cut |
A proper cut begins just above the branch bark ridge and extends through the stem parallel to the branch bark ridge. Usually, the stem being removed is too large to be supported with one hand, so the three cut method should be used.
Cut 1 – With the first cut, make a notch on the side of the stem away from the branch to be retained, well above the branch crotch.
Cut 2 – Begin the second cut inside the branch crotch, staying well above the branch bark ridge, and cut through the stem above the notch.
Cut 3 – Cut the remaining stub just inside the branch bark ridge through the stem parallel to the branch bark ridge.
To prevent the abundant growth of epicormic sprouts on the stem below the cut, or dieback of the stem to a lower lateral branch, make the cut at a lateral branch that is at least one-third of the diameter of the stem at their union.
Original post here https://www.doityourself.com/stry/prunetreecuts/.